
I used to hate making my own scrapbooking and cardmaking kits because it messed up my organization system. I worked so hard to separate my supplies by manufacturer, brand, or occasion only to pull out random items and set them aside in a kit. Until I actually worked with my kit, my embellishments sat there, apart from the rest of my carefully organized stash. Then AFTER I worked through my kit, I had to RE-SORT the embellishments BACK. I did that a few times, but I always seemed to have embellishments everywhere, and it made me crazy. I never felt organized.
Then I thought, what if I made my kits differently? For me, the part that took the longest was deciding on paper and cardstock for my scrapbook pages and cards. The embellishments always seem to speak for themselves. But the paper… If I could get my paper choices under control to form a kit of my own, making the projects would be easy.
So, I came up with a formula that works for me EVERY SINGLE TIME. I have yet to experience failure with the Sandpaper Road Formula™. And it works for EVERYONE, from the beginner to the seasoned papercrafter. FIRST, forget the idea of putting embellishments in your kit. Instead, put your kits together with a paper-only formula as follows:
See how I chose EXAMPLES of my own DIY scrapbooking “kits” using the Sandpaper Road Formula™ (including examples of patterned paper choices) in this video:
CHOOSE 4 SOLID-COLORED CARDSTOCK PIECES 12″ x 12″:
- 2 – pieces light cardstock (exactly the same color);
- 2 – pieces dark cardstock (exactly the same color);
CHOOSE 6 PATTERNED PAPERS 12″ x 12″:
- 2 – pieces patterned paper (exactly the same pattern);
- 1 – coordinating piece patterned paper different from the two “sames” above (it should be a relatively “plain” pattern – not too busy or crazy);
- 1 – additional coordinating piece patterned paper with a DIFFERENT relatively “plain” pattern;
- 1- coordinating piece patterned paper with a crazy, wild, busy pattern;
- 1- additional coordinating piece patterned paper with a DIFFERENT crazy, wild, busy pattern; AND FINALLY,
CHOOSE at least 6 pieces plain white cardstock, 8-1/2″ x 11″ or larger (for best results, choose cardstock with a weight of #110 or higher. I recommend Neenah Paper Exact Index #110, which costs around $8.00USD on Amazon for a ream of 250 sheets).
THAT’S IT!
Just remember your solids are: 2 whites, 2 lights, 2 darks.
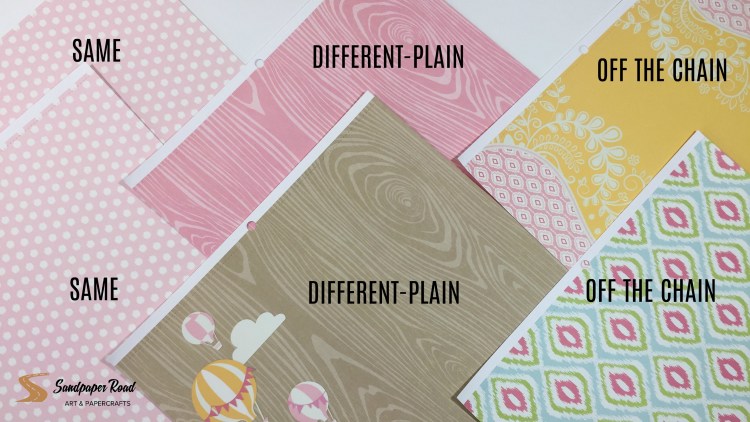
Your patterns are: 2 of the same, 2 ‘differents-plain’, and 2 ‘off the chain’. YOU determine what is “different-plain”and what is “off the chain”. It is completely up to you. AND, your choices may change from kit to kit. But it is ALWAYS your choice, based on what you have and your preferences.
The formula works BEST with 12″ x 12″ paper stacks or with open-stock paper from one single manufacturer, and it works GREAT with double-sided paper!
Here are a few REAL EXAMPLES of my own patterned paper choices, and how I labeled them. I ALWAYS label my papers on the back or with a sticky note, because once I start cutting, I tend to forget which was my “different-plain #1” and which was my “different-plain #2”.


Here is a look at the finished kits, complete with solid colored and white cardstock:


It is MUCH easier to stay organized creating paper-only kits. You can focus on making the basic pages all at once and worry about embellishing afterward. I have found that with this method, I get lots more done in less time, plus it is easy to store pages in-progress when I am only worrying about paper. AND, these paper-only kits travel extremely well. Imagine how much you can accomplish in one sitting or at a crop if you are only making the base pages! AFTER you make your basic pages, work with one page at a time to embellish it. You’ll know for sure later what embellishments to use or what embellishments you need to buy. You will no longer have to clutter your workspace or haul around bulky scrapbooking kits filled with EVERYTHING you “might” use.
Give the Sandpaper Road Formula™ a try. Create your own DIY scrapbooking and cardmaking kit TODAY! Enjoy!
If you enjoyed this post, please LIKE and SHARE with your crafty friends! Don’t forget to click “FOLLOW” to be the first to know when Sandpaper Road posts something new on the blog!
*This post contains affiliate links.
